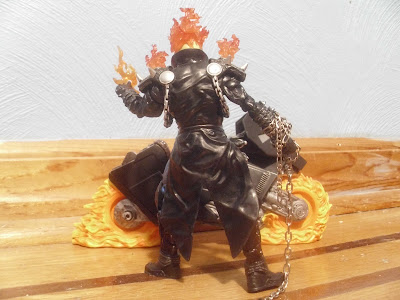
Hey guys, so originally these were going to be divided into several different posts but I decided to string'em together in one post. Today we'll be looking at some quick mods and customizations. The first one is probably the most complex, Marvel Legends Ghost Rider! Now I had modded this guy in the past but I was never fully satisfied with him but now, I think we have a winner!
Supplies Needed:
Needle-Nose pliers
Needle-Nose pliers
neck chain
Blue Sharpie Paint Marker
Paper Towels
crazy glue
First remove all additional pieces, his jacket, belt, and head. Take the paint marker and go over the pants a bit at a time. after leaving the paint on for 5 seconds take a paper towel and smudge it around to create the denim-esque look. Next for the jacket, my initial problem was that it was too clunky. Therefore I cut off the pegs and peghole pieces of the jacket. Trimmed down the underarm area so his arms can go down to his side, and glued it down to his torso so it stays in place and looks more form fitting. The shoulder pads, I trimmed the outer edges so the arms have more clearance to move forward and back as well as out to the side. On the belt I removed most of the chains save for the top right chain. As for the fire accessory in his hand, its just a marvel universe iron fist accessory. The neck chain can be used however you like, I like wrapping it around his forearm and having it go all the way to the floor.
Next up is Marvel Legends Thor. This started out as a wave 1 Return of Marvel Legends Thor, but I wanted a Marvel Now! Avengers #1 Thor. I did take some liberties with the design though ( I dont like the black under the arms on the design).
Supplies Needed:
Needle Nose pliers
Red fabric
Scissors
black fabric
Black Sharpie Paint Marker
Rubber bands
Wal Mart Exclusive 6" Movie Thor
Crazy glue.
I started with the head. I cut the hair off from below the wings foward, took the wings from the wal mart thor off, flipped them upside down and glued them on to the underside of this Thor's wings to create the cheek guards, then took the hair I cut off and glued that onto the bottom of the flipped wings. and painted the whole helmet silver.
Now, I repainted his whole torso, boots, and sash...thingy with the black shrpie paint marker, give it a half hour to dry. I also painted on fingerless gloves to his hand. Also let dry for a half hour. While that drys, begin cutting the black fabric to glue onto the front of the sash (See first pic) and cut the cape. Cut off the original cape, take the fabric and line up the top so that the layers connected to the uru orbs are layered (see above) and glue down. wait 30 seconds, re apply glue, wait 30 seconds and apply a lien of glue where the cloth meets the orbs for extra security. Lastly, wrap the rubber bands around his calves and ankles. That's about it!
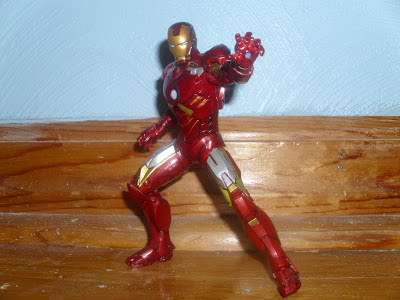
Next is The Avengers Mark VII Iron Man. This guy started out as the Mark IV but when I found out Hasbro wouldnt be making a 6" Mark VII I got to work. This is a straight up repaint.
Supplies Needed:
Sharpie silver paint marker
Sharpie gold marker
Sharpie ultra fine point black marker
This is the easiest one. Just print yourself out a pictue of the Mark VII and go to town. I oulined all the lines in the armor with the black sharpie. But here's the trick, the gold areas. Paint in silver first, then once it dries, go over it in gold regular sharpie marker to get the most accurate gold tone.
Now last but not least we have The Avengers Thor. I found out that yet again Hasbro would not be making an Avengers style Thor in 6" scale so I got to work.
Supplies Needed:
Marvel Select Thor
Red Sharpie paint marker
Blue Sharpie paint marker
Navy Blue Sharpie
Black Sharpie
lighting effects from any Star Wars 3 3/4" figure
crazy glue
scissors
red cloth
paper towels
In the torso, match your figure to the above image, and you'll notice some of the black area on the torso armor was silver, simpl go over it in black Sharpie and rub it in with a paper towel. Next wherever you see a red outline on the torso, that was done with the Red paint marker. As for the gauntlets the red around them is just red cloth that I cut and glued down. For Mjolnir, I just crazy glued lighting bits all over it. For the head, take the Marvel Select Thor head and take a scissor and scrape around the inside to create a hole that will fit snugly on the ball joint. Finally remove the cape that the figure comes with, and glue on the Marvel Select Thor cape.
Thats it for today, hope you guys enjoyed!


No comments:
Post a Comment